Overview
This web page provides detailed instructions for creating new projects within Code Composer Studio that are properly configured to support the use of the MSP430 Operating Environment and example code provided by this website.
Adding the Operating Environment Files
If you haven't done so already, download the “Libraries” directory for the MSP430F5529LP at the following location GitHub: MSP430F5529LP, and copy the folder to the Workspace directory.
Creating the New Project
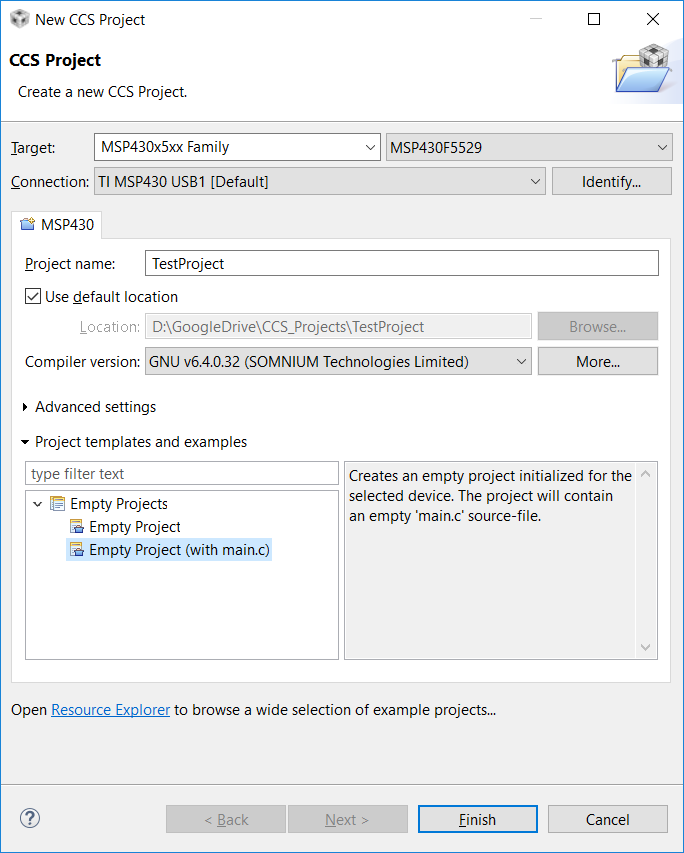
To create a new project, select File - New - CCS Project
In the pop-up window that appears, perform the following tasks:
- In the drop down menu directly to the right of “Target:”, select “msp430x5xx Family”.
- In the far-right “Target:” drop-down, select “msp430f5529”.
- Fill in the “Project name:” field with the name of your project. In this example I used TestProject. You should use whatever name is appropriate. This will cause a sub-directory to be made with the same name as the project under the Workspace directory.
- In the Compiler version:” drop-down menu, select “GNU v6.0.32 (SOMNIUM Technologies Limited)” (your version may be different).
- Under “Project templates and examples”, select “Empty Project (with main.c)”.
- Click Finish.
The first project will open looking like this. Play around with moving things within the workspace the way you like it. If you add new panes, like “Breakpoints” (using View - Breakpoints), you can drop it on top of an existing tab, like Console, and it will place it inside the same pane, with a tabbed view. This is really useful when you get to the debugging view.
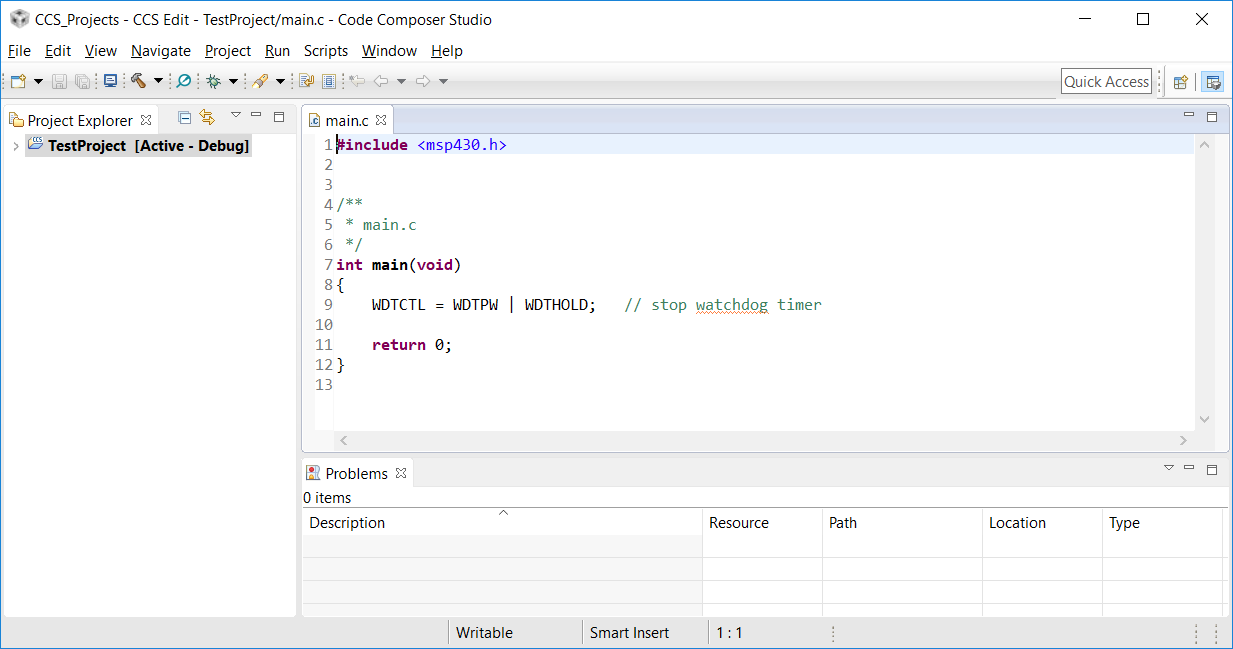
In the Project Explorer pane, select the project name to make sure it is the active project. If it is, the name will be bold, and “[Active – Debug]” will appear to the right of the name. Since this is the first project in the Workspace, it should already be active.
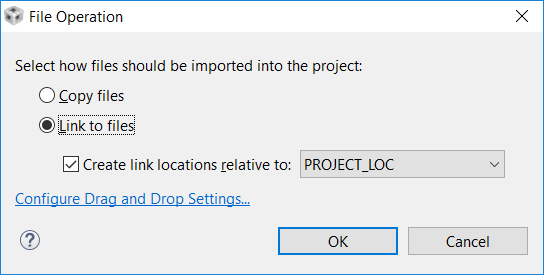
Right-click on the project name and select “Add Files…”. In the pop-up window, navigate to the Libraries - Hardware directory, and select the MSP430F5529LP.h and MSP430F5529LP.gel files, and press Open. Another pop-up window will appear, asking how the files should be imported. The choices are to Copy files, or Link to files.
Before you make this choice, here are some things to consider. If you plan on using the Operating Environment for several projects, and it is likely that you will want to modify the files in ways that would be useful to share between projects, then Linking to the files is the right choice for you. If on the other-hand you want to modify the Operating Environment files in ways that will be specific to a single project, or you plan on “playing around” and think you might be likely to break the files, then Copying the files is for you. Whatever you decide, it is always possible to start over. Don’t sweat it.
If you are Linking to the files, select “Link to files”, and keep he default setting of “Create link locations relative to PROJECT_LOC”. If you are copying the files, select “Copy files” instead.
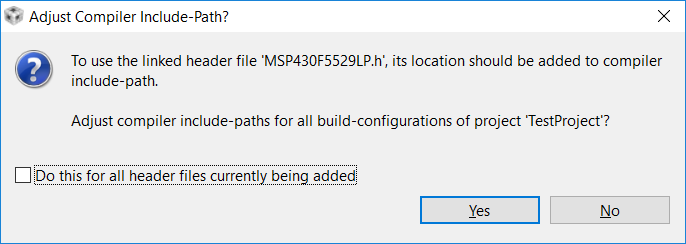
I selected "Link to Files", which resulted in a pop-up window asking whether the location for the .h header file should be added to the compiler include path. Selecting Yes is the easiest option, which will automatically add the needed paths. If you select No, the next section describes how to set the paths manually. If you selected Yes, it is recommended that you use the instructions to verify that the paths were added properly.
A Few Extra Steps For Linking Files
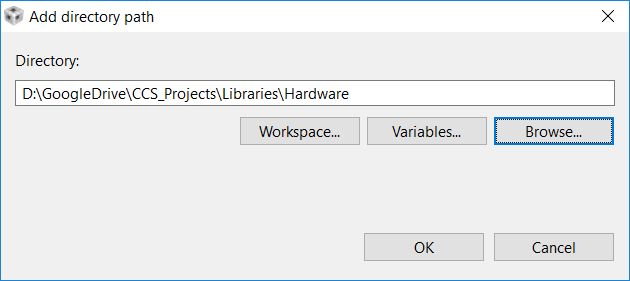
If you decided to Link files into the project, but didn't select Yes to the auto-include request, there is one additional step required. it is necessary to include the directories where the files actually exist in the compiler path list. To do this, right-click on the active project, and select “Properties”. In the pop-up window, select Build - GNU Compiler - Directories on the left. Then in the Include paths window select the icon with a document and a green plus to add a new entry. In the pop-up window, select “Browse”, navigate to the Libraries\Hardware directory, and select OK.
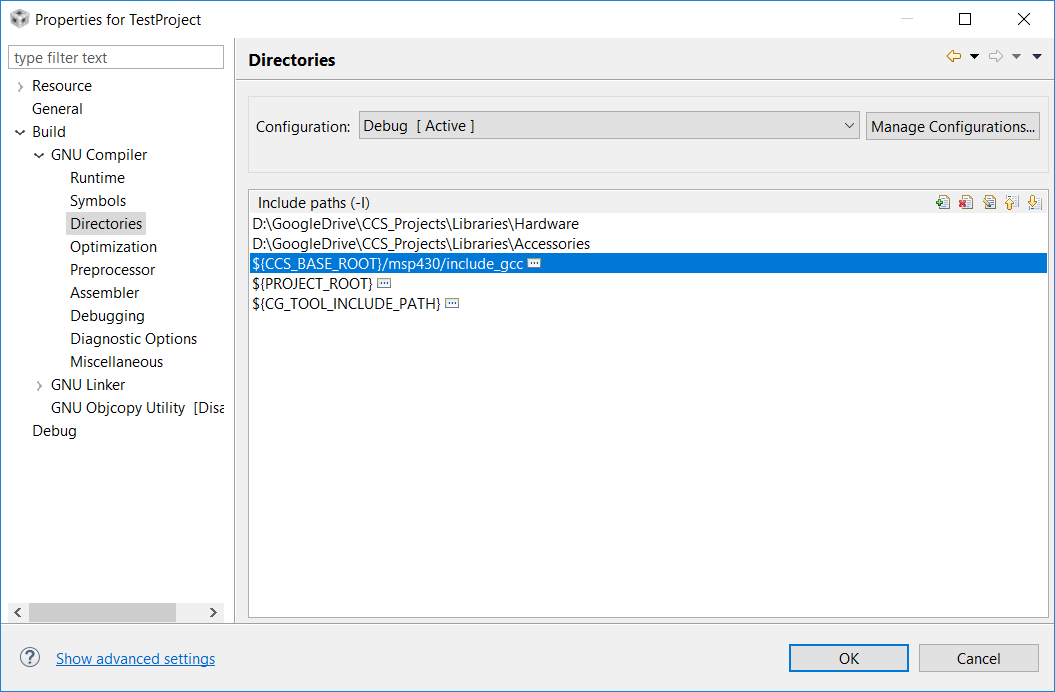
Repeat this step to also include the Libraries\Accessories directory. Use the icons with the up and down arrows to move the new directories upwards so that they are at the top of the include paths list. When you are done, the list should look similar to this.
Setting Optimization
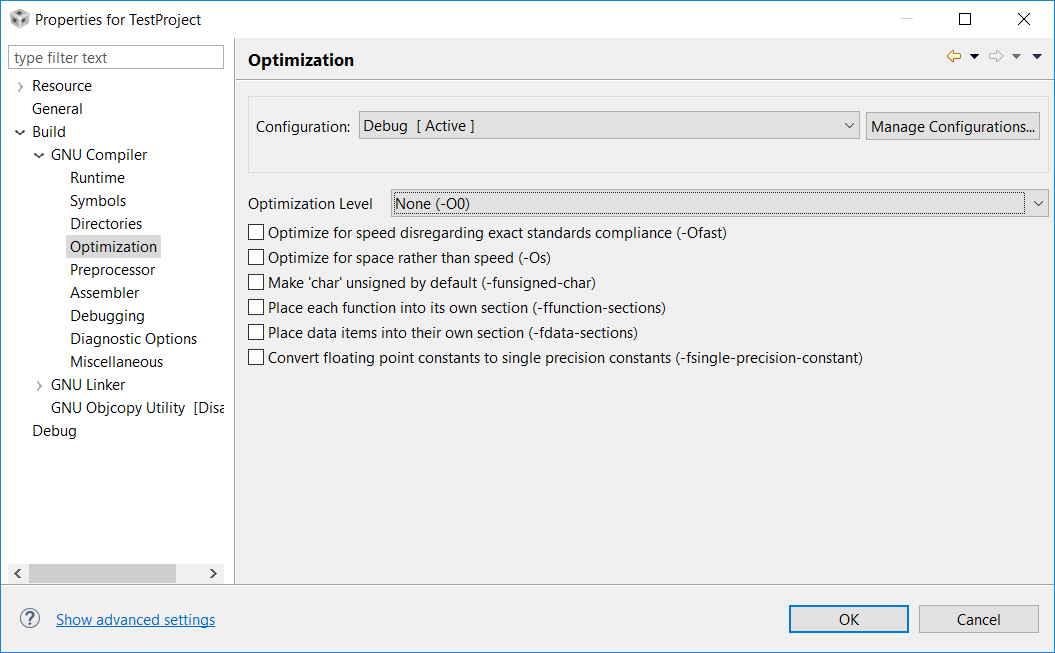
Next, select Build - GNU Compiler - Optimization on the left. For new projects, the “Optimization Level” will be blank. Select the drop down menu, and select “None (-O0)”. This is the best default choice until such time that optimization becomes necessary. Heavy optimization can make debugging tricky even for experienced programmers. Select OK to close the Properties window.
Setting The Initialization Script For Debugging
Under the active project, expand the “targetConfigs” folder. Under this you should see an MSP430F5529.ccxml file. Double click on this file. This will bring up a configuration screen with various drop-down menus and checkboxes. Look for a section called “Advanced Setup”. It should be in the upper right-hand corner. Within this section is a link called “Target Configuration”. Click on this link. Alternatively, you can select the “Advanced” tab at the bottom of the page.

Under Target Configuration, you will see a list of “All Connections”. At the bottom of this list will be “MSP430”. Select it, and a section called “Cpu Properties” will appear. To the right of the “initialization script” select the Browse button, and navigate to the MSP430F5529LP.gel file. Select it and it will appear in the textbox. The “Save” button to the left of this section will become clickable. Click it to save changes, and then you can close the file.
The reason for the initialization script is to load all of the definitions from the MSP430F5529LP.h file into the debugger. This will allow you to view all of the peripheral registers in the debugger, even if you haven’t used them in your code.

Setting Up The Memory Regions
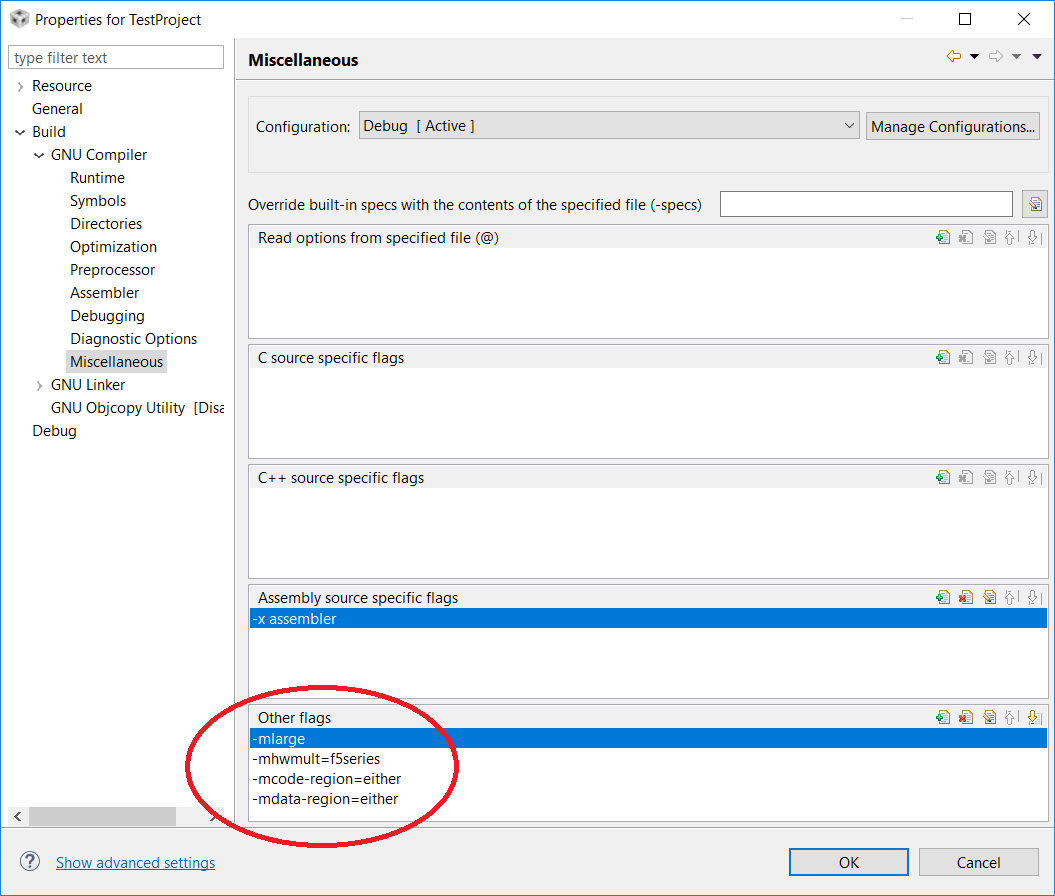
In order to use the entire flash space, which will be required when you start using C libraries and functions, it is necessary to change the code region and data region options. To do this, right-click on the active project, and select “Properties”. In the pop-up window, select Build - GNU Compiler - Miscellaneous on the left. Then under "Other Flags", select "-mcode-region=none" and change it to "-mcode-region=either", and select "-mdata-region=none" and change it to "-mdata-region=either". Editing is done by selecting the icon with a document and a pencil on it.
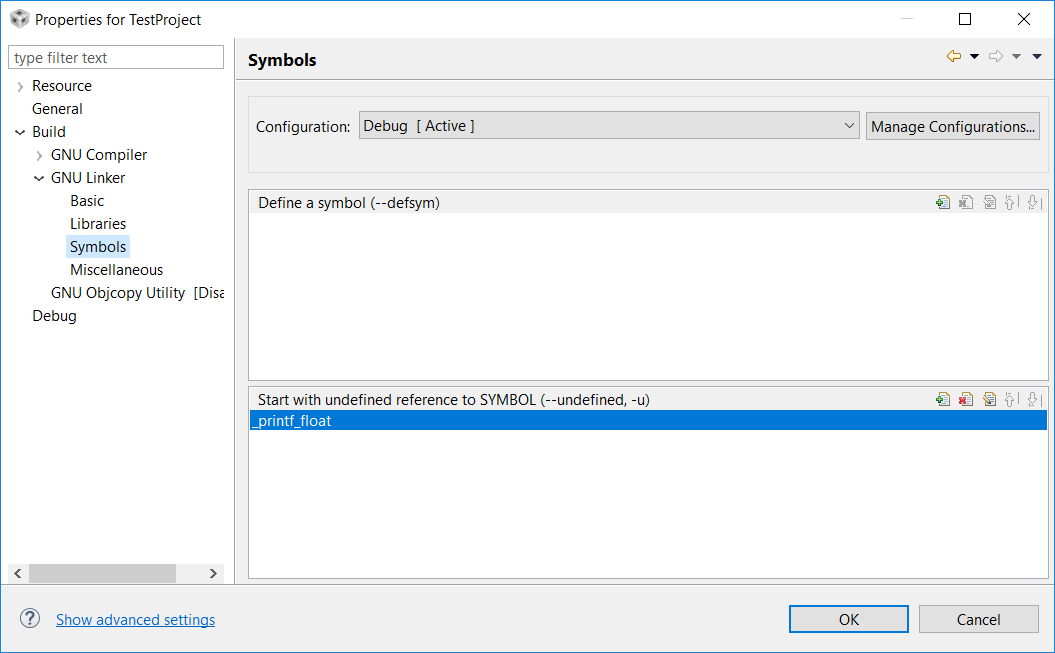
Setting Printf Support Level
The default printf support level for the GNU compiler was reduced in CCS v7 compared to CCS v6. In order to use printf functions (including sprintf, vsprintf, etc.) to print floating point values the support level must be modified. To do this, right-click on the active project, and select “Properties”. In the pop-up window, select Build - GNU Linker - Symbols on the left. Then under the "Start with undefined reference to SYMBOL (--undefined, -u) section, add a new flag "_printf_float". Adding flags is done by selecting the icon with a document and a plus on it.
Give it a try!
At this point the project is configured and ready. Check out some of the examples to see how to use the Operating Environment.